Designing a Multi-Level Paludarium Terrarium With a Waterfall
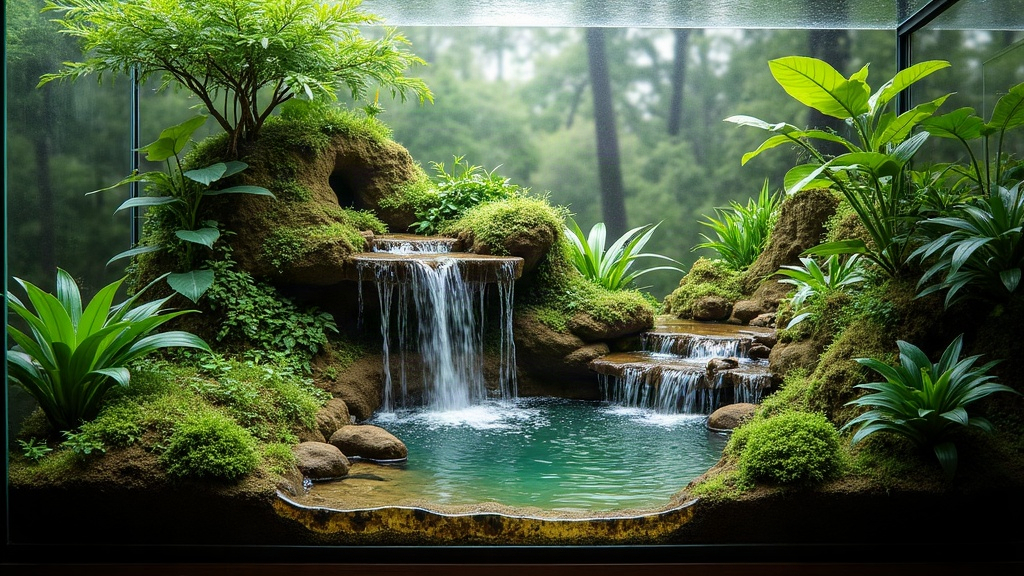
Building a Multi-Level Paludarium With a Recirculating Waterfall
A multi-level paludarium with a recirculating waterfall pulls land, water, and vertical terrain into a single living system. Get the build right and it runs itself, quiet pump humming away in the background, instead of turning into a weekend chore you dread. Below is the actual process: planning the layout, building a false bottom and water reservoir, plumbing a pump that won’t drive you crazy with noise, and picking plants and hardscape that actually hold up in a wet, humid box.
What Makes a Paludarium “Multi-Level”
A basic paludarium just splits a tank into water on one side, land on the other. Simple enough. A multi-level design throws elevation into the mix instead, terraced land masses, rock shelves, carved foam backgrounds, so water has somewhere to actually go. It cascades down through the enclosure, pools at the bottom in a hidden reservoir, then gets pumped right back up to start over.
Why bother with the extra complexity? A few reasons:
- It creates real microclimates in one tank (the top stays drier, the bottom stays soaked)
- You get far more usable planting surface without adding floor space
- The sound and movement of falling water is what makes a paludarium feel alive, not just decorative
- It mimics actual stream and waterfall ecosystems, which plants and animals respond to with noticeably better health
Step 1: Plan the Water Path Before Building Anything
Don’t touch the foam yet. Grab a pencil first and sketch exactly where the water will go:
- Source, the point where the pump dumps water out, usually tucked behind the top terrace
- Flow path, the route it takes cascading over rocks or wood down to the next level
- Collection point, the lowest pool or hidden sump where it drains back to the pump
Skip this step and you’ll build gorgeous terrain that water just doesn’t flow through properly. The result: dead zones that never dry out, mold creeping in corners, and patches that stay bone-dry no matter how much you mist them.
Step 2: Build the False Bottom and Reservoir
Most builders go with an egg-crate and mesh false bottom to keep the water reservoir separate from the substrate sitting on top of it.
- Use PVC egg-crate light diffuser panels as your rigid frame, raised 1.5 to 2 inches on PVC standoffs or cut pipe sections.
- Cover it with fiberglass window screen. Skip nylon, it breaks down over time and you’ll be redoing this later. The screen stops substrate from washing straight down into your reservoir.
- If the tank isn’t watertight on every side already, seal the reservoir with 100% silicone (aquarium-safe, no additives, check the tube).
- Size the reservoir generously. A humid, splashy tank like this can lose a surprising amount of water to evaporation in a single day, and you don’t want the pump running dry overnight.
Step 3: Build the Terraced Hardscape
The go-to method here is Great Stuff spray foam (the black aquarium-safe version, or regular foam sealed over later) layered onto cut foam board:
- Stack and carve the foam board into terraces, and don’t forget to leave channels where water can actually move from one level down to the next.
- Before your final carving pass, anchor the heavier pieces into the foam: PVC pipe for internal pump tubing, cork bark, spiderwood. Easier to embed now than to force in later.
- Once the shape is right, coat everything in a layer of GE Silicone I, then press a substrate or coco fiber mix into it by hand. This gives you that natural rock-and-soil look instead of obvious foam.
- Let it cure completely. Follow whatever the manufacturer lists, usually 48 to 72 hours, before adding water or plants. Foam and silicone off-gas while curing, and that can harm anything living in the tank.
Step 4: Select and Install the Pump
Pick a submersible pump matched to your tank size and the lift height you need:
- Small paludariums (under 20 gallons): something in the 93 to 160 GPH range with adjustable flow
- Larger builds (40+ gallons): 200 to 300 GPH, ideally with a pre-filter sponge so it doesn’t clog within a week
Route the tubing through the inside of your hardscape, letting it exit at the top terrace hidden behind rockwork so none of the plumbing shows. Before you seal anything for good, run water through the system for at least an hour and actually listen to it. Too loud? Too forceful, knocking plants around below? Adjust the outlet position now, not after everything’s glued in place.
Step 5: Choose Plants for Each Zone
- Splash zone (right by the waterfall): Java fern, Anubias, mosses. They want constant moisture and will sulk anywhere drier.
- Mid-level terraces: Pothos, Peperomia, small ferns
- Upper, drier zones: Tillandsias, Hoya, bromeliads
- Water pool: Hornwort, dwarf sagittaria, or java moss, all useful for biofiltration too
Maintenance Tips
- Clean the pump’s pre-filter every 2 to 3 weeks, or flow starts dropping off without you noticing why.
- Top off evaporated water weekly, always with dechlorinated water.
- Trim mosses and the fast-growing stuff monthly so your water channels don’t clog shut.
- During water changes, check the waterfall face for algae and scrub it down with a soft brush.
Final Thoughts
A multi-level paludarium with a recirculating waterfall rewards patience more than it rewards skill with a glue gun. Map the water’s path before you build anything. Get the false-bottom reservoir solid. Let the foam and silicone cure the full time, even when you’re itching to add water early. Match each plant to the zone it actually wants to live in, not just where it looks nice. Do all that and you end up with something that barely needs you: a small, constantly shifting rainforest corner that looks, and sounds, like it belongs somewhere far from your living room.