Building a First Closed Terrarium With Pilea Glauca & Ferns
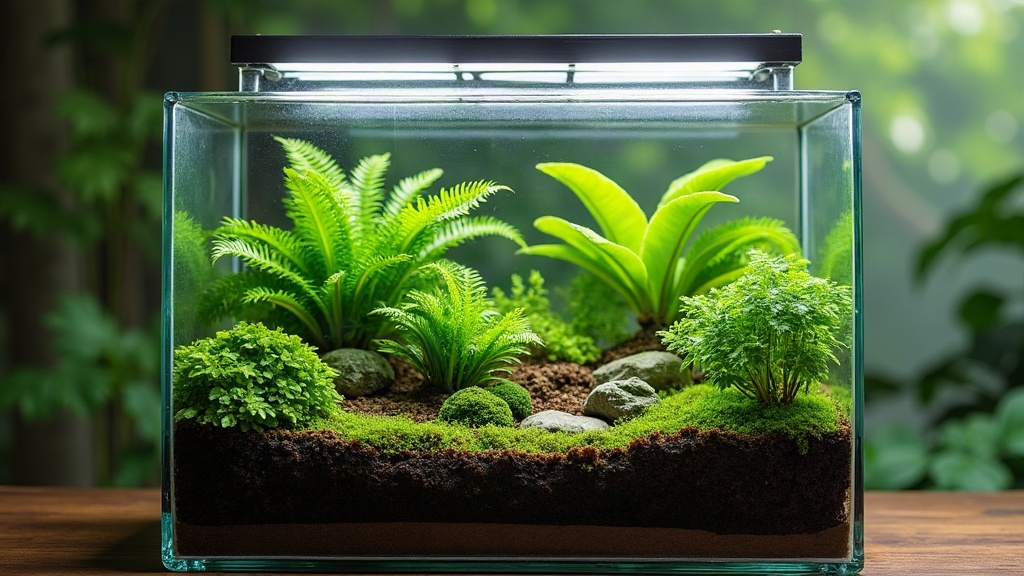
Building a Closed Terrarium with Pilea Glauca and Miniature Ferns
If you’ve ever wanted to grow something green without babysitting it every day, a closed terrarium might be your answer. Pairing Pilea glauca with miniature ferns is one of the easiest ways to get started. Both plants love the humid, sealed-off world a glass jar creates, both forgive rookie mistakes, and together they form a tiny self-sufficient landscape that can keep going for years with barely any attention from you.
Why Pilea Glauca and Miniature Ferns Work So Well Together
Not every plant is cut out for life behind glass. A closed terrarium holds humidity close to 100%, barely lets air move, and only gets filtered, indirect light. Pilea glauca (sometimes labeled “Artillery Plant,” though it also gets mistaken for a Baby’s Tears look-alike) and miniature ferns such as Pteris, Selaginella, or Nephrolepis “Fluffy Ruffles” handle this setup well, and here’s why:
- Both come from humid forest floors in the wild, so low light and constant moisture are basically home turf for them.
- They stay compact and grow slowly. That means less trimming and no risk of them suddenly outgrowing their glass home within a month.
- Visually, they play off each other nicely. Pilea’s silvery-green, trailing leaves against the feathery, almost lace-like fern fronds gives even a small jar a sense of depth.
What You’ll Need
- A clear glass container with a lid (an apothecary jar, an old fishbowl with a glass cover, even a repurposed cookie jar)
- Activated charcoal, aquarium grade
- Horticultural pumice or fine gravel, for drainage
- A layer of sphagnum moss (stops soil from clogging up the drainage below)
- A well-draining, low-nutrient potting mix (potting soil mixed with perlite and a little orchid bark does the job)
- Pilea glauca cuttings, or a small nursery-grown plant
- One or two miniature fern starts
- Extras for looks: small rocks, a piece of driftwood, sheet moss
Step-by-Step: Layering Your Terrarium
1. Build the Drainage Base
Start with a 1 to 2 inch layer of pumice or gravel at the bottom. Excess water pools here, away from the roots, which is what stands between you and root rot, by far the most common reason closed terrariums fail.
2. Add the Charcoal Layer
Next comes a thin layer of activated charcoal, right on top of the drainage stones. It filters water as it cycles through the system and keeps odor and mold in check over the months (or years) your terrarium will be running.
3. Insert a Moss Barrier
A thin sphagnum moss layer goes in next. Its job is simple: stop fine soil particles from trickling down and clogging your drainage layer over time, so each layer stays doing its own job.
4. Add Your Soil Layer
Now add 2 to 3 inches of your soil mix. That’s enough room for roots to settle in without giving the plants so much space that they grow out of control fast. Don’t flatten it out perfectly, either. A few gentle hills and dips make it look far more natural.
5. Plant Pilea Glauca and the Ferns
Put the fern toward the back or center, since it works well as a focal point. Let the Pilea trail along the front or sides, where it can cascade over a rock or piece of driftwood. Water lightly right after, just enough to settle the roots. You’re not trying to soak the soil at this stage.
Watering and Sealing
A closed terrarium runs on its own little water cycle: moisture condenses on the glass during the day, drips back onto the soil at night, and the whole thing stays hydrated almost indefinitely. Once your plants are in:
- Mist lightly, then check back in a few hours for a light haze of condensation on the glass.
- If the glass fogs up completely and stays that way all day, prop the lid open for a few hours to vent some of that moisture out.
- Once it looks balanced, close the lid for good. A well-tuned terrarium can go months without needing another drop of water.
Light Requirements
Bright, indirect light suits these plants best. A spot a few feet back from an east or north-facing window usually works well. Skip direct sunlight entirely. It can turn a sealed glass jar into a mini oven and cook your plants in a matter of hours.
Common Beginner Mistakes
- Overwatering at setup. Moisture builds up fast in a sealed jar, so start with less than you think you need.
- Using garden soil. It’s too heavy and holds too much water. Go for a terrarium mix or something light and well-aerated instead.
- Skipping the drainage layer. This shortcut is probably the single biggest cause of root rot down the line.
- Picking fast growers. Vigorous plants will outgrow a closed jar quickly and demand constant trimming, which defeats the whole low-maintenance idea.
Long-Term Care
Once things settle in, a closed terrarium with Pilea glauca and miniature ferns barely needs you at all:
- Trim back anything touching the glass or growing taller than you’d like.
- Pull out yellowing leaves or any sign of mold with tweezers as soon as you spot them.
- Check in every few weeks. Crack the lid open briefly if condensation gets excessive, or if the inside looks dry for too long.
Final Thoughts
A closed terrarium with Pilea glauca and miniature ferns is about as forgiving a project as you’ll find for beginners wanting a living, breathing display that mostly runs itself. Get the layering right (drainage, charcoal, moss, soil), pick plants that actually want high humidity, and find a decent balance between light and moisture. Do that, and you’ve basically built a tiny self-sustaining world that’ll keep growing and looking good for years without asking much of you in return.